

The Groovy Quilt Pattern & Coloring Pages
- Jen Wagner

- Aug 31, 2023
- 7 min read
The story of Groovy started with a request from my local guild, the Desert Quilters of Nevada, to design a quilt for their 2023 retro themed retreat. I debated for several weeks about how I wanted to highlight the style and colors of the 60's and 70's. My decision was made when I saw a photo of a plate of cookies on pinterest. The cookies were flowers, smiley faces, and peace signs, all done up for a retro themed party. I just had to make those cookies in quilt form. I mean, how can you not love a quilt that smiles back at you?
I'm going to tell you lots about this quilt including color options, layouts, construction, etc. If you're just looking for the coloring pages (which are free), skip to the end of this post for the link to download them.

I started my hunt for retro floral fabrics at Sew Yeah Quilting where I was thrilled to find the orange floral print "Marje Melon" from the Bee Vintage Collection by Lori Holt for Riley Blake Designs and the Cherrywood hand dyed solids to match. Then I went on a day trip to St. George, Utah with some quilty friends to shop hop and found the green floral print "Green Doodles" by Kimberbell for Maywood Studios. With that I was ready to make this quilt! Avocado green + burnt orange = RETRO! 😍

If you look closely at my finished quilt, you'll see that there's a second green floral (Sweet Baby Jane by Me and My Sister Designs for Moda) and a cherrywood green solid. I worked out the kinks in the flower block using the Kimberbell fabric and ran out! Thankfully, I had the other two fabrics in my stash so I could finish the quilt in time for the retreat!

When I got to cutting the fabric, I decided one orange solid was enough so I went with the lighter Cherrywood orange called Marigold and used it for the binding too. This was the first time I've worked with Cherrywood hand dyed fabrics and I loved them! The fabrics have a crinkled texture that reminds me of suede and they're not completely solid. The fabric starts as an unbleached muslin so there are dark flecks that remain after the fabric is dyed. The photos just can't do it justice.
I went with Art Gallery's "Raw Gold" from their Pure Solids collection for the back to really tie in that rich burnt orange from the Lori Holt floral. Mmmm, yummy! Makes me think of butterscotch.

Good News: If you love these floral prints, I was able to track them down and have a limited number of kits. Get them while they last!
Color Palettes: During the 1960's and 1970's, a wide range of colors gained popularity so you don't have to go with avocado green and burnt orange in your quilt. Here are six other great ideas for color in this quilt...
1. Psychedelic Hues: Bright and bold colors were all the rage, especially those associated with psychedelic art. Think electric blues, neon pinks, vivid oranges, and acid greens.
2. Earth Tones: The 1970s saw a surge in earthy and natural tones. Earth colors such as browns, beiges, tans, and olive greens were widely used in fashion and interior design, reflecting a growing interest in environmental consciousness and a back-to-nature movement.
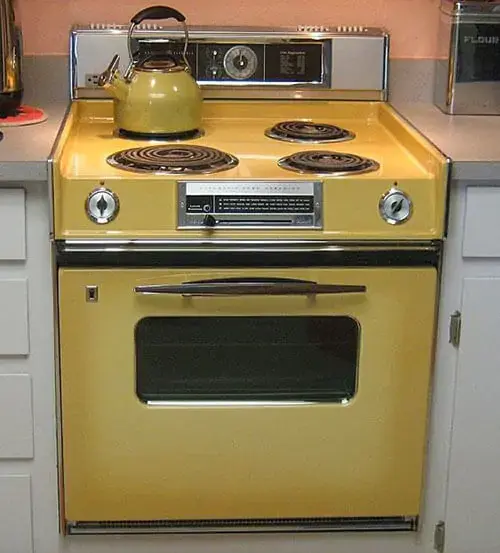
3. Harvest Gold: This particular shade deserves its own mention. This warm and rich golden-yellow color was incredibly popular during the 1970s and could be seen on appliances, kitchenware, and home decor items. Does this look familiar? And that avocado green tea pot!
4. Pastel Colors: While the '60s and '70s are often associated with bold and bright colors, pastel shades like baby blue, soft pink, and mint green were also prevalent.
5. Rainbow Colors: The rainbow motif, symbolizing peace, love, and unity, was highly popular during the countercultural movements of the '60s. It was often seen on clothing, flags, posters, and various other symbols of the era.
6. Tie-Dye: Tie-dyeing became a major trend during the late '60s and early '70s, featuring a myriad of colors swirled together in a psychedelic, free-spirited pattern.
Construction: You all know that I love putting curves in my quilts so this quilt should come as no surprise. There are 3 curves to piece in Groovy - the smiley face is one and the ring of the peace sign makes up the other two with the inside and outside curve. When I posted a video on social media of me constructing a peace sign block, one response was "Double inset circles was a jump scare 😂 😂 😂 ". This response did not surprise me.
Why are quilters so terrified to do curves? They're scary because when you have the fabric under the needle of your sewing machine, the circle lays flat but the fabric that will frame it doesn't and as quilters we want our blocks to lay flat. So how do we go from waving fabric while stitching to a flat block? I lay out all the tricks in the instructions but don't just take my word that these curves are totally doable and worth the effort.... look at the amazing work of my pattern testers!
The two tie dye blocks shown below were made by Amanda who had never pieced a full circle when she started testing for me. She has easily nailed this technique just by following the pattern!
I'm going to let you in on a little secret... these blocks start at 13" but when they're done being put together, we trim them down to 12 1/2". You can do this! You can make flat and square blocks with curves in them.


This next quilt top was made by my lovely Aunt Carol who recently started pattern testing for me. She went all out making 4 peace sign blocks and 4 smiley face blocks! That's 12 full circles she stitched and the results speak for themselves! Her version is just so cute!

Yay! You're still here! I'm glad that the circles didn't make you run off! The smile and eyes are raw edge appliqued and the flower block uses a unique reverse applique technique that I walk you through step by step in the pattern with lots of diagrams.
Layout options: If you want your quilt filled up with just one of these blocks, there are yardage requirements and cutting instructions for those in the pattern too. So the pattern really is 4 quilts in 1! Bonus! Of course, you can put together the blocks in any layout you want as my Aunt Carol did. 😍 Love it!


What you need to make Groovy:
The Groovy Quilt Pattern -Get the Digital or Physical pattern
Fusible Web - Heat n Bond and WonderFuse are great options
Fusible Interfacing - lightweight
Elmer's Glue
Spray Starch or your favorite starch, I use Faultless
Circle Savvy Ruler by Creative Grids, optional as paper templates are in the pattern
Fabric - Kits available - 2 options - you can get just the floral prints or the floral prints, solids, and binding
Coordinating thread to match the smiley face eyes and smiles
Batting & Backing

Quilting the Quilt:
I decided to quilt free motion psychedelic waves as they add a nice texture to the quilt and fit the theme perfectly. I used white thread in the top and bobbin. Deep burnt orange thread to match the back would have looked great but I didn't want to worry about it showing on the top. Sometimes simple is best and it certainly works here. To do this design, I loaded my quilt on my longarm frame and then put a piece of painter's tape all the way across it, parallel to the top of the quilt, and starting 3" down from the top. Then I made a wave up and down all the way across from left to right, staying within the boundary of the tape. Next, I moved the tape down 1" and waved back across from right to left echoing the first wave. Then it's just repeat to the end. The waves are closer to each other from side to side than they are from top to bottom. This allowed me to stay within the space of my quilting frame and move down through the quilt row by row. Sometimes I'd let them lean or have an extra hump and sometimes I kept them more vertical. If the waves started to go too crazy, then I'd run out of space and have to roll the quilt back and forth and that's just a hassle so I kept them within the space of the previous wave and the tape. This way too, the starts and stops were all off the edges of the quilts. No tying off and burying threads except for when the bobbin ran out!
Daisies would also be super cute as an all over quilting design. How would you quilt it?
Coloring Pages: Click the button below to download the free coloring pages for all four quilt layouts! I'd love to see your "Groovy" coloring page and project as you make it, share it on the Snapdragon Quilting Club Show & Tell Group!
I did get this quilt & the pattern done in time for the Desert Quilters of Nevada retreat without staying up too late! Woohoo! Isn't it so cute hanging in my booth? This was my first quilting retreat EVER (gasp) and it was so much fun!

If you've never participated in a quilting retreat, I would highly recommend it! Because when quilters get together, they have fun and grow closer, learn from each other, get to make for hours on end, and eat real good! We had 85 quilters and 4 vendors all under one roof and I can't wait for next year. Local guilds are most often the ones that coordinate events like this but if a retreat isn't happening in your area, organize one (Suzy Quilts has a great post about this). I even got the chance to do a little stitching of my own and started a new quilt & pattern. Stay tuned! I am working with Riley Blake on this one and it's gorgeous!!! 🤩 🥳

Groovy will always make me smile as it reminds me of fond memories of my first quilting retreat and the amazing quilters I spend the weekend with. I hope you enjoy making this quilt as much as I have! Let me know what you think in the comments below!
Happy Quilting!


Comments